
Reflex finders, also known as "red-dot" or "zero-power" finders, are essential accessories for amateur and professional astronomers alike. These devices serve as tools to help align telescopes with celestial objects in the night sky. Unlike magnifying finderscopes, reflex finders provide an unmagnified view, allowing the user to see a broad swath of the sky with ease. With the aid of a projected reticle or red dot, they make it easier to pinpoint a starting point for star-hopping or to quickly locate bright celestial objects like the Moon, planets, and prominent stars.
How Reflex Finders Work
Reflex finders operate using a simple optical principle. A small LED light source projects a reticle (often a dot or circle) onto a transparent window or lens. When you look through the finder, you see this reticle superimposed on the sky. The brilliance of the reticle can usually be adjusted for brightness to adapt to different sky conditions, allowing the observer to find objects without overwhelming the natural starlight.
The key feature of a reflex finder is that it doesn't magnify the image. Instead, it acts like a heads-up display, helping you align your telescope's field of view by pointing the dot at your intended target. Once centered, the telescope will be roughly aligned, making it easier to fine-tune through a higher magnification eyepiece.
Types of Reflex Finders
There are several types of reflex finders, each with distinct features:
- Standard Red-Dot Finders:
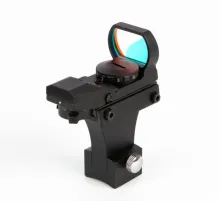
The most basic type, these project a single red dot onto the viewing window. They are lightweight, affordable, and easy to use, making them a popular choice for beginners. - Multi-Reticle Finders:
These finders offer a choice of reticles, including circles, crosshairs, and dots. The different patterns can be useful for different viewing needs, such as centering or finding specific types of objects. - Telrad Reflex Finders:
A popular choice among amateur astronomers, the Telrad is a large and versatile reflex finder that projects three concentric circles (0.5°, 2°, and 4° in diameter) onto the viewing screen. This makes it particularly useful for star-hopping and matching celestial charts to the sky. - Heads-Up Display (HUD) Finders:
These finders feature advanced digital displays and sometimes include additional data like azimuth and altitude readouts. HUD finders are typically more expensive and often used by those who want precision alignment or have advanced computerized mounts.
Pros of Using Reflex Finders
- Ease of Use:
Reflex finders are intuitive to use, especially for beginners. Since they provide a natural, unmagnified view, there's no need to worry about orientation or inverted images, making them much simpler to operate than traditional magnified finderscopes. - Quick Target Acquisition:
The broad field of view means you can acquire targets much faster. Just point the red dot at a visible star or object, and you’re set to fine-tune through your telescope. - Comfortable Viewing:
Unlike optical finderscopes that sometimes require awkward viewing angles, reflex finders allow for comfortable and ergonomic alignment, reducing strain during longer observation sessions. - Compatibility:
Reflex finders can be attached to most telescopes using universal mounts. Many models come with a dovetail base or adhesive mount, ensuring compatibility with a wide range of optical tubes.
Potential Drawbacks
- Lack of Magnification:
Because reflex finders don’t magnify the image, they’re not suitable for locating faint objects or deep-sky targets that aren’t visible to the naked eye. They work best for aligning on bright stars or planets. - Battery Dependence:
Since most reflex finders rely on LEDs, they require batteries. Users must ensure the batteries are always charged, or they risk losing the ability to find objects easily in the field. - Weather Sensitivity:
Dew or condensation on the reflex finder's lens can obscure the reticle, making it difficult to use in humid or cold environments. Additional accessories like dew shields may be required.
Tips for Using a Reflex Finder Effectively
- Align the Finder Before Observing:
Reflex finders need to be calibrated with the main telescope. Start by pointing the telescope at a distant terrestrial object during the day or a bright star at night, and adjust the finder’s alignment screws until the reticle overlays the same point in the eyepiece view. - Use Low Brightness Levels:
Set the brightness of the reticle to the lowest visible level. Bright settings can obscure faint stars and distort your night vision. - Combine with Other Finders:
Many experienced astronomers use a reflex finder in conjunction with an optical finderscope. The reflex finder is used for coarse alignment, and the magnifying finderscope is used for fine adjustments, especially for faint or small objects.
Popular Reflex Finders and Recommendations
- Celestron Star Pointer Pro:
This reflex finder projects dual-circle reticles and has a large viewing window. It’s a good mid-range option that works well for most telescopes. - Telrad Reflex Finder:
The Telrad is a classic choice with its three concentric circles. It’s ideal for large telescopes or observers who prefer star-hopping techniques. - Orion EZ Finder II:
A budget-friendly option, this basic red-dot finder is lightweight, easy to install, and perfect for beginner telescopes. - Rigel QuikFinder:
Smaller and lighter than the Telrad, the Rigel QuikFinder also projects concentric circles but is better suited for smaller telescopes.
A good reflex finder can make a significant difference in your stargazing experience, especially when trying to align your telescope quickly and efficiently. Whether you’re just starting out or you’re a seasoned observer, a reflex finder is an invaluable tool to have in your astronomy toolkit. Consider the features and specifications that match your observing style, and enjoy the convenience and precision they offer when exploring the night sky.